Azure App Registration
These steps will help you get started in using the APIs inside an Azure Application using delegated permissions
Make sure to have completed the Getting Started steps first

Create a new App Registration
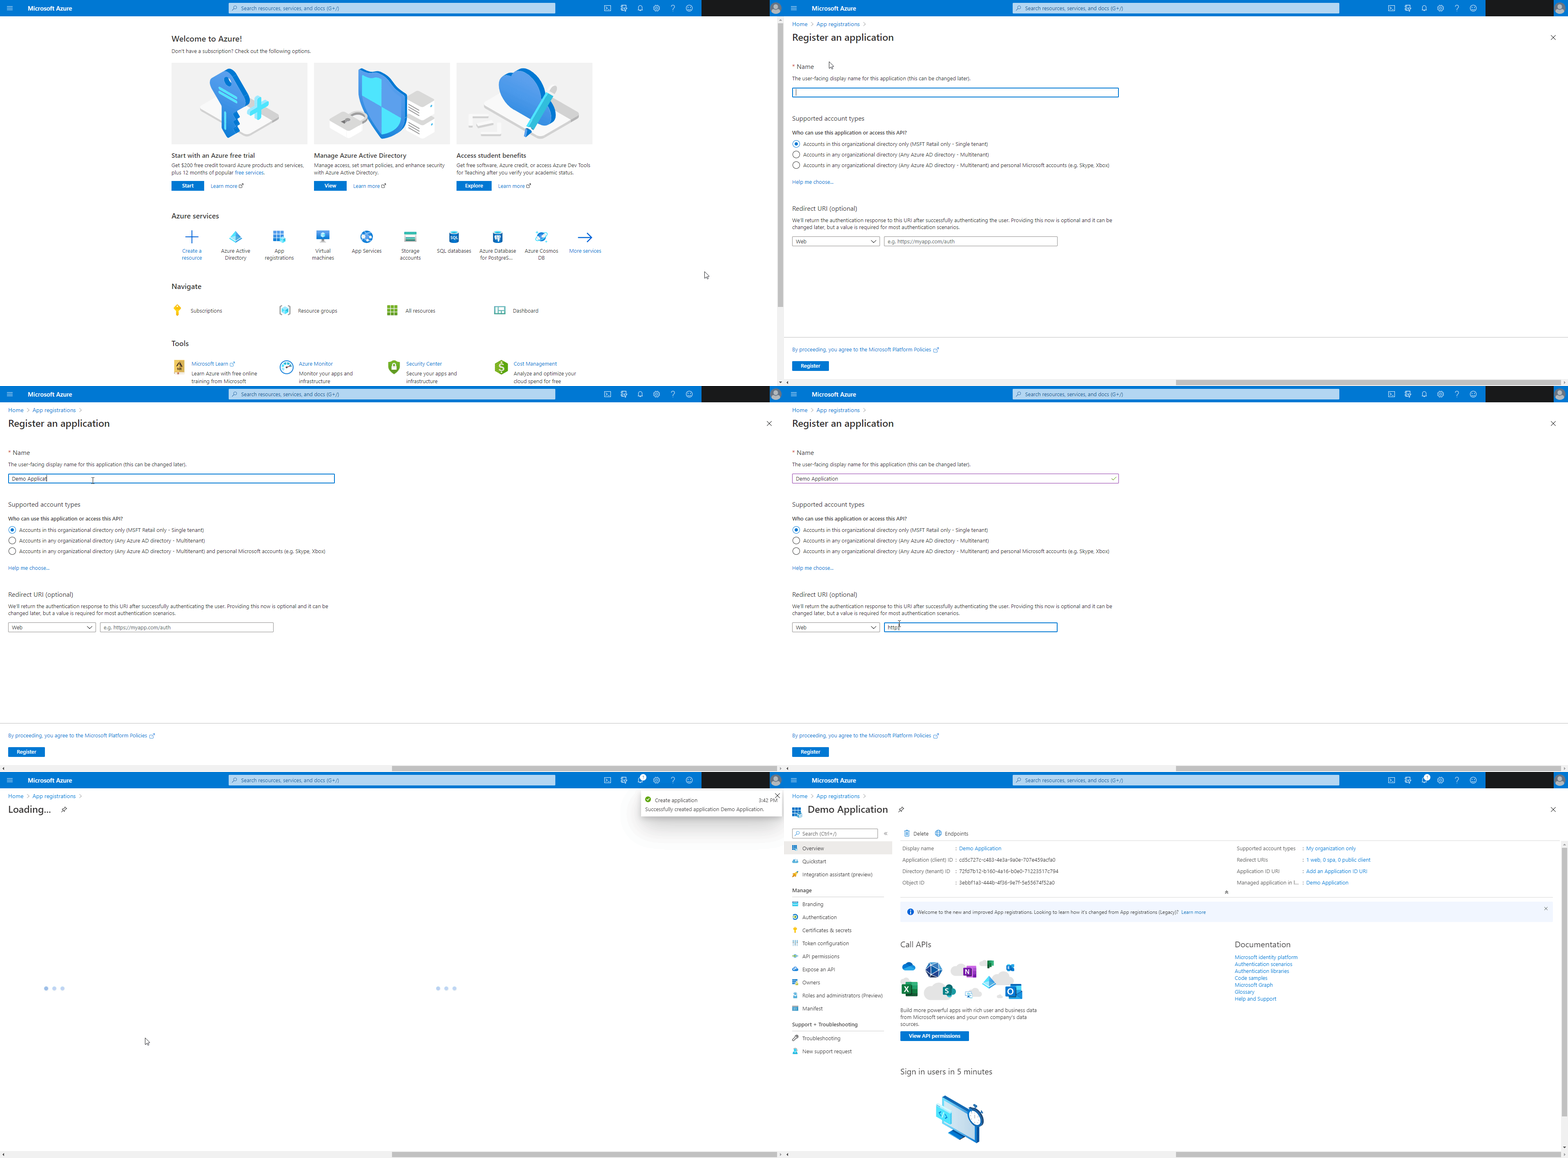
Go to the Azure Portal and go to the App registrations blade
Click the New registration button and fill out the application name, choose the account type, and optionally add a redirect URL (localhost is good to add initially for developing an application on your local computer)

Add Customer Insights API Permissions
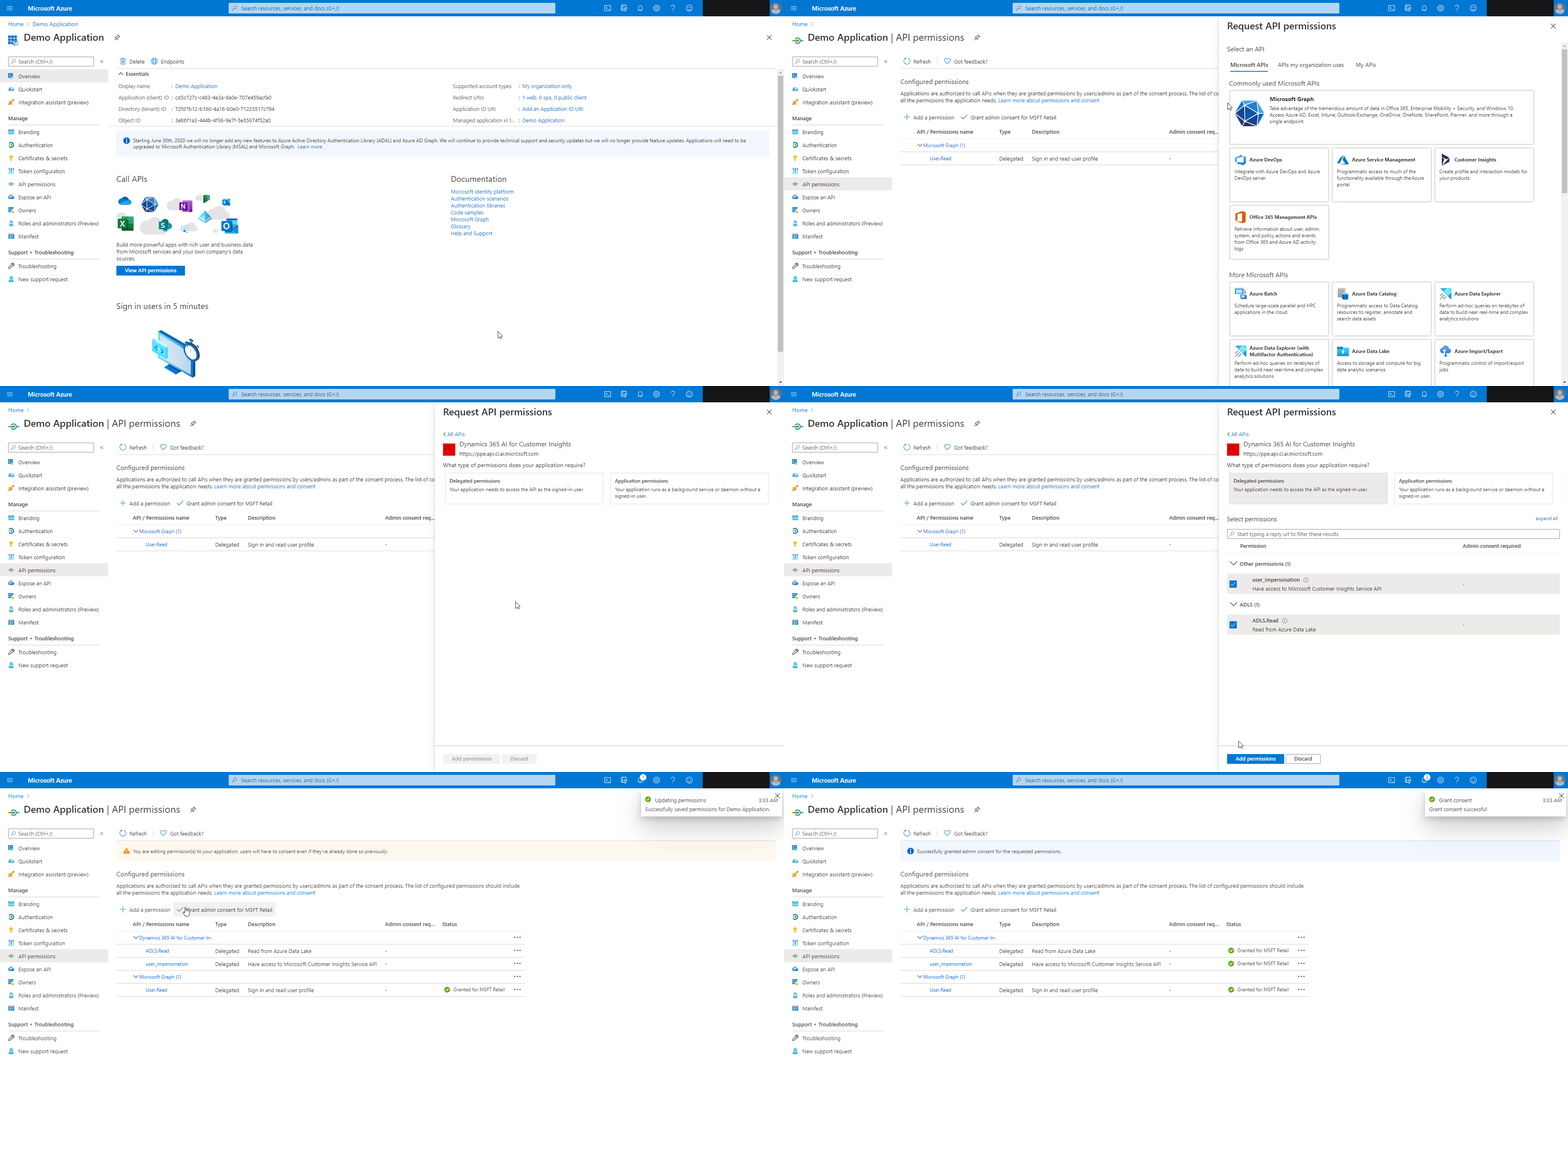
On your new App registration, navigate to the API permissions tab
Click Add a permission and search for Dynamics 365 AI for Customer Insights in the side-window
For the permission type, select Delegated permissions, check the user_impersonation permission, and click the Add permissions button (if you need to access the API without a user logging in, view the server-to-server instructions).
Finally click the Grant admin consent for... button
Next steps
Your app registration is now ready to use
You can use the Application/Client ID for this app registration (on the Overview page) with the Microsoft Authentication Library (MSAL) to obtain a bearer token to send with your request to the API
More information about how to use MSAL can be found here
For information on using the API via the Customer Insights client libraries, check out our instructions here